Don't miss interesting news
Not all arbitrage providers cooperate with affiliates, many of them are hosted on websites with a parked domain. In this case, the Facebook pixel is used to track conversions and correct traffic, but working with it is usually considered boring and inefficient, as there is a chance of losing access to data due to the blocking of your Facebook account. Let’s find out whether this is a myth or a reality.
A pixel is a piece of code that is placed on a website and tracks user behavior (visits, clicks, conversions, etc.). It allows you to create, evaluate, and optimize the audience for your advertising campaign.
A pixel is simultaneously transferred to several different accounts that advertise similar products and collect up-to-date data. It can be personal for a specific advertising campaign and general for a company with different advertising accounts, but it counts absolutely all conversions in all advertising accounts.
The pixel is primarily used to track conversions, but in case of failure due to Facebook malfunctions, it can hurt them.
One Facebook pixel can be used simultaneously on several websites.
Optimizes advertising to achieve its goal, allows you to track that the offer is distributed directly to the target audience, i.e. people who have visited your website and have not completed the action.
It automatically creates and customizes individual audiences for people who have already completed an action on the website – clicked on it, put an item in the cart, or purchased it.
Many arbitrage specialists doubt the work of the pixel because they consider the process of its creation and configuration to be complicated. The negative attitude to the code is reinforced by the fear that after blocking the Facebook advertising account, the pixel will be lost and the work will be fruitless. However, webmasters forget that the code allows you to “warm up” customers and improve your advertising campaign, and to avoid losing a pixel, you need to know some of the features. We will tell you how to create, customize, and export a pixel below.
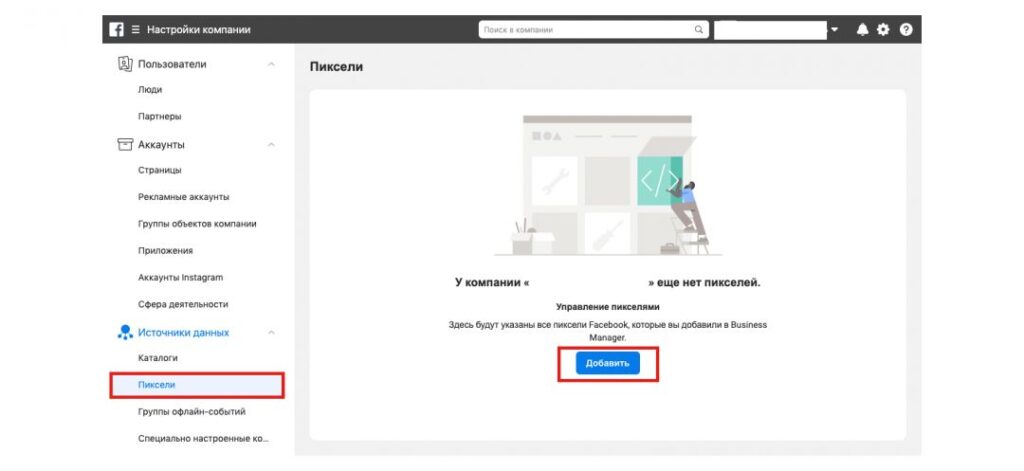
1. Log in to Facebook Ads, select the Data Sources block in the left menu, then Pixels. When a new window appears asking you to create a pixel, click Add.
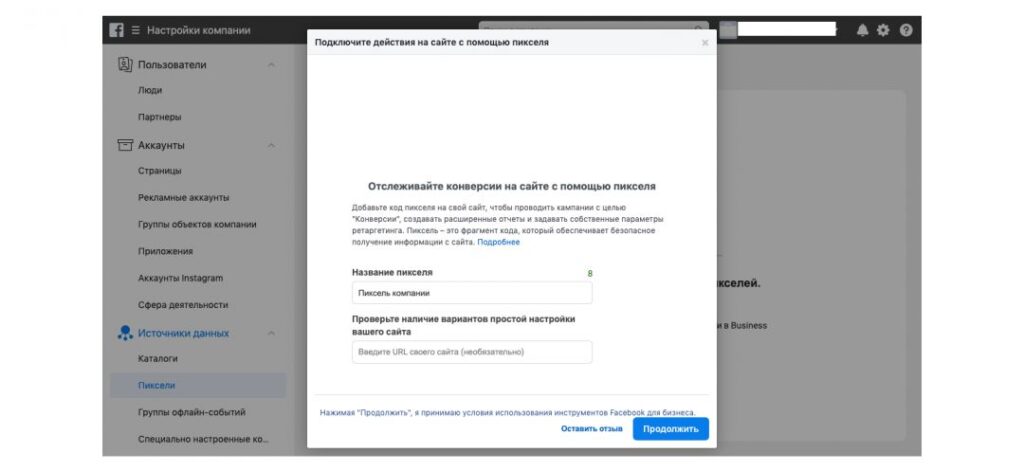
2. In the next window, create a name for the pixel and, if necessary, provide a link to your website, and then click Continue.
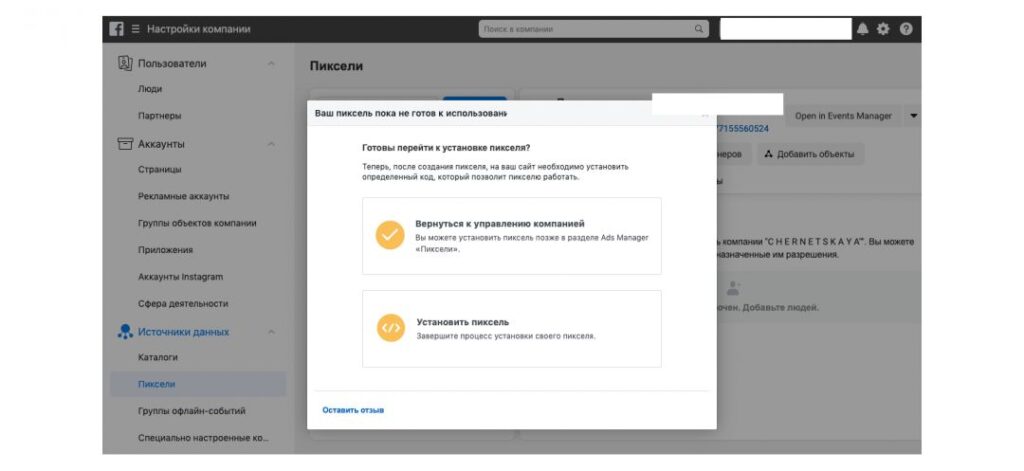
3. Facebook offers to install the pixel now or later. Choose the appropriate option.
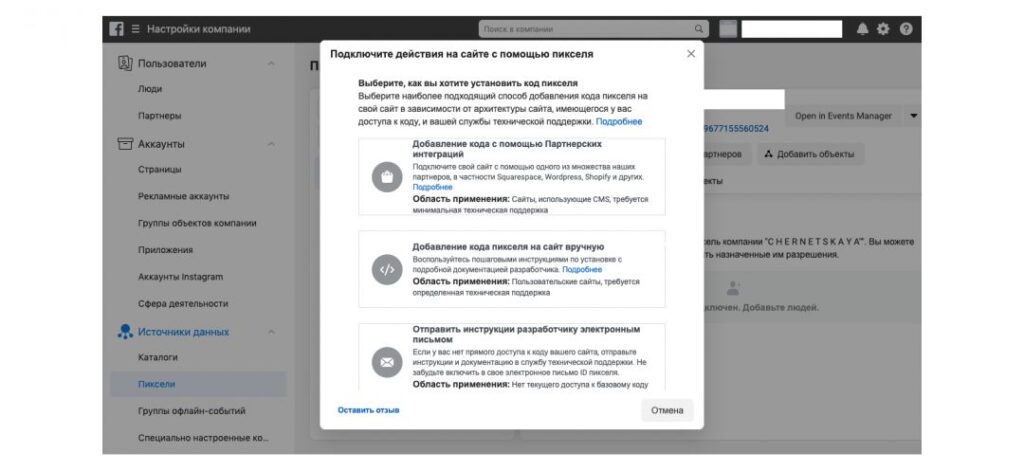
4. The next step will be a menu offering to add the code using partner integrations, manually, or receive instructions via email.
5. When you select the “Add manually” block, you will see the pixel itself – the large code in the first screenshot. Copy it and add it to your website.
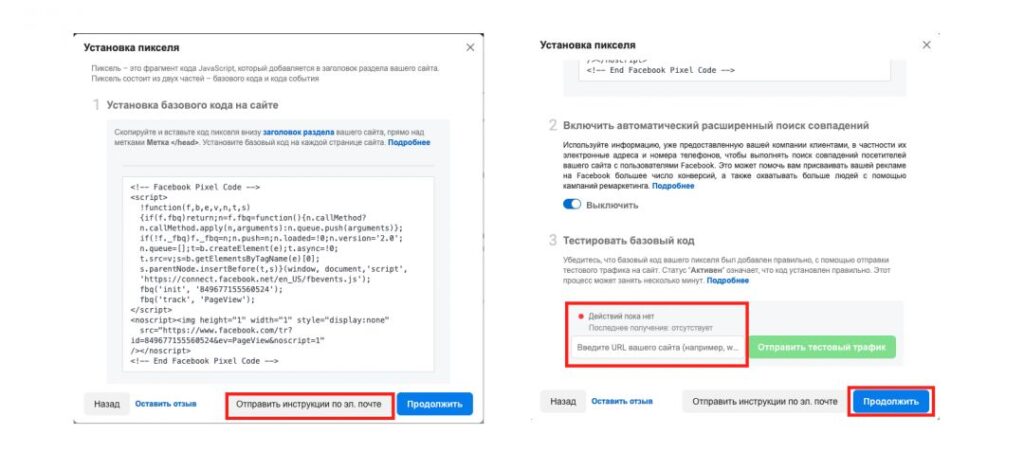
To do this, go to your website’s folder and place the pixel between two tags in the index.html file, upload the file to your hosting, and then refresh the page. After that, Facebook will offer to check the code’s performance using test traffic.
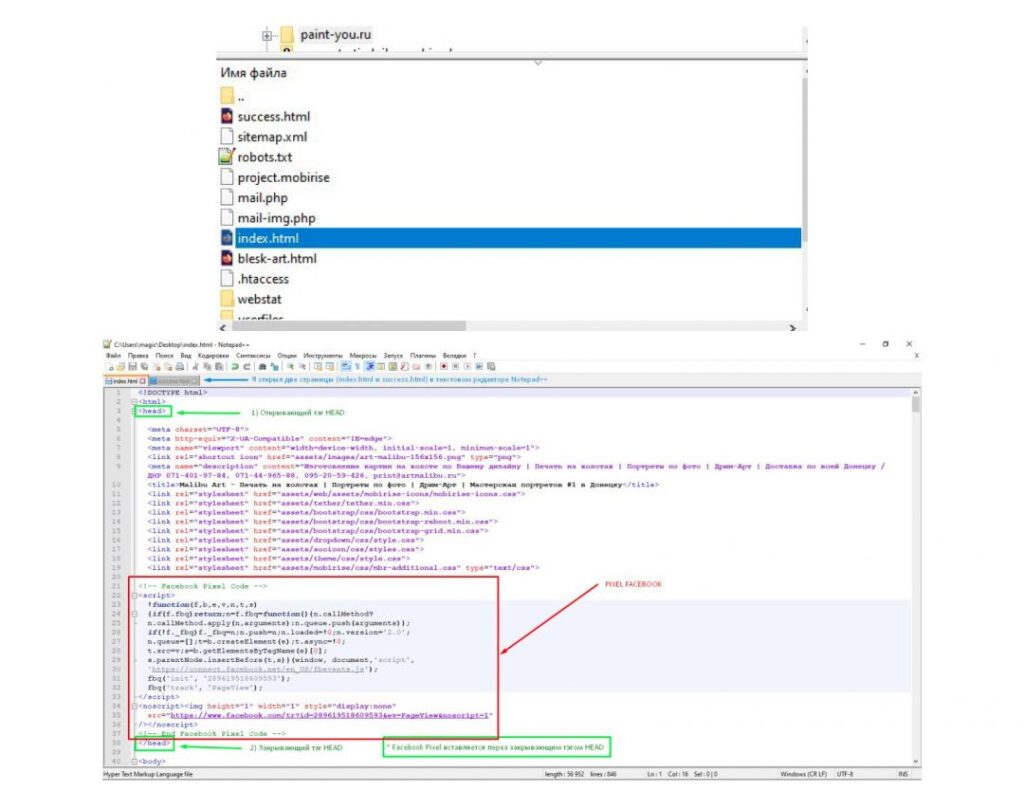
As you can see, the process of creating a pixel does not take much time and is not complicated.
Analytics of your website’s user activity is displayed in the Pixels category. To customize the data you need, select “Open in event manager”.
Facebook Pixel is an excellent tool that allows you to analyze your work in more detail and provides an opportunity to interact with the target audience and carry out remarketing. Moreover, the complexity of creating and configuring a pixel is a myth, as this process is simple and time-consuming, and you can save yourself from losing it by connecting it to the Business Manager. Evaluate your time and enjoy all the benefits offered by Facebook developers!